SSH into EC2 Instance
MAC & Linux Users
-
Open Terminal application in your local system.
-
Navigate to the location where .pem key is downloaded and stored in your local.
-
To update Permissions, run command
-
Syntax : chmod 400 keypair_filename
-
Example : chmod 400 ec2_connect.pem
-

-
User Name of the server :
-
Amazon Linux AMI : ec2-user
-
Ubuntu AMI : ubuntu
-
OPENVPN AMI : root
-
-
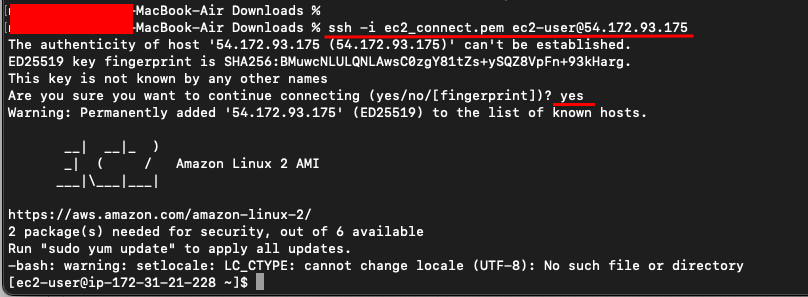
To SSH and connect to the EC2 Instance, Enter the following command:
-
Syntax : ssh -i keypair_filename UserName@publicIPAddress (enter the username and public IP address)
-
Example : ssh -i ec2_connect.pem ec2-user@54.172.93.175 --> Click Enter
-
Up next, type yes and Enter, you will be successfully logged into EC2 Instance.
-
Microsoft Windows Users
-
Download putty and puttygen from this link : https://www.chiark.greenend.org.uk/~sgtatham/putty/releases/0.74.html
-
To convert your key pair .pem to .ppk:
-
Open
 .
. -
Click on
 .
. -
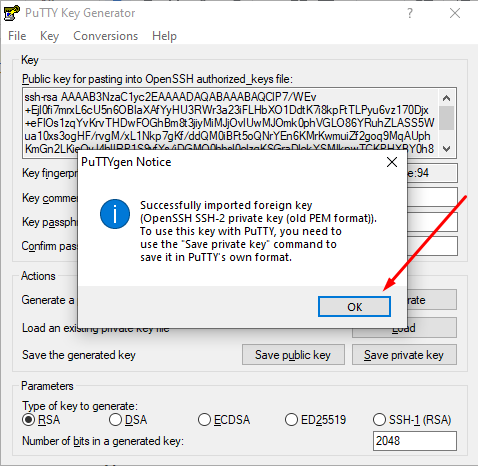
Click on All files to show your .pem file and select the .pem keypair file.
-
You will get a success message if done correctly.
-
- Click on the Save Private Key button.
-
Enter keypairname and Save.
-
keypairname.ppk file will be saved to your local machine.
-
Navigate to the EC2 instance page and get the public IP of the machine.
-
Open

-
Host Name : Enter the public IP address
-

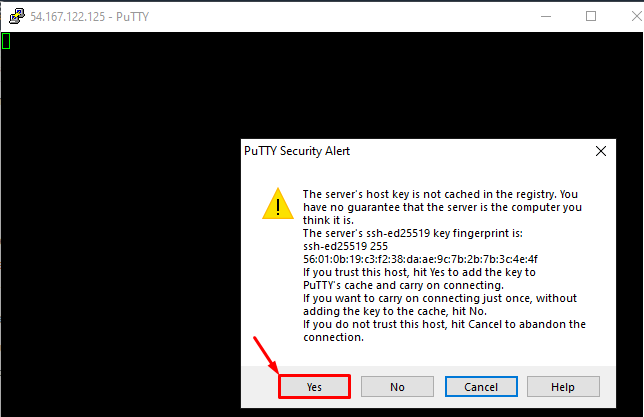
- Click
 , select
  and again click credentials, then
  to select the private key (.ppk) that you converted from the .pem file.
 - Click on
 .
.

- Select
to connect to the machine.
-
If you are using Amazon Linux AMI for the lab:
-
Enter user name: ec2-user and hit Enter.
-

-
If you are using Ubuntu AMI for the lab:
-
Enter user name: ubuntu and hit Enter.
-
-
If you are using OPENVPN AMI for the lab:
-
Enter user name: root and hit Enter.
-
-
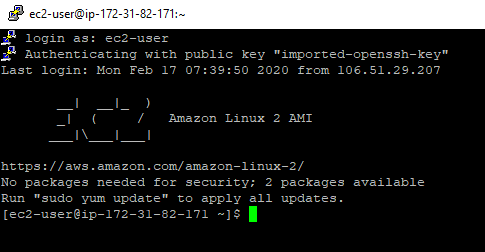
You will see the console after a successful login.